How to Sew Your Own Applique Quilt Jacket
Sewing your own quilt jacket is such a fun way to reuse old quilts, but what if we added an even more fun twist and did some appliqué?
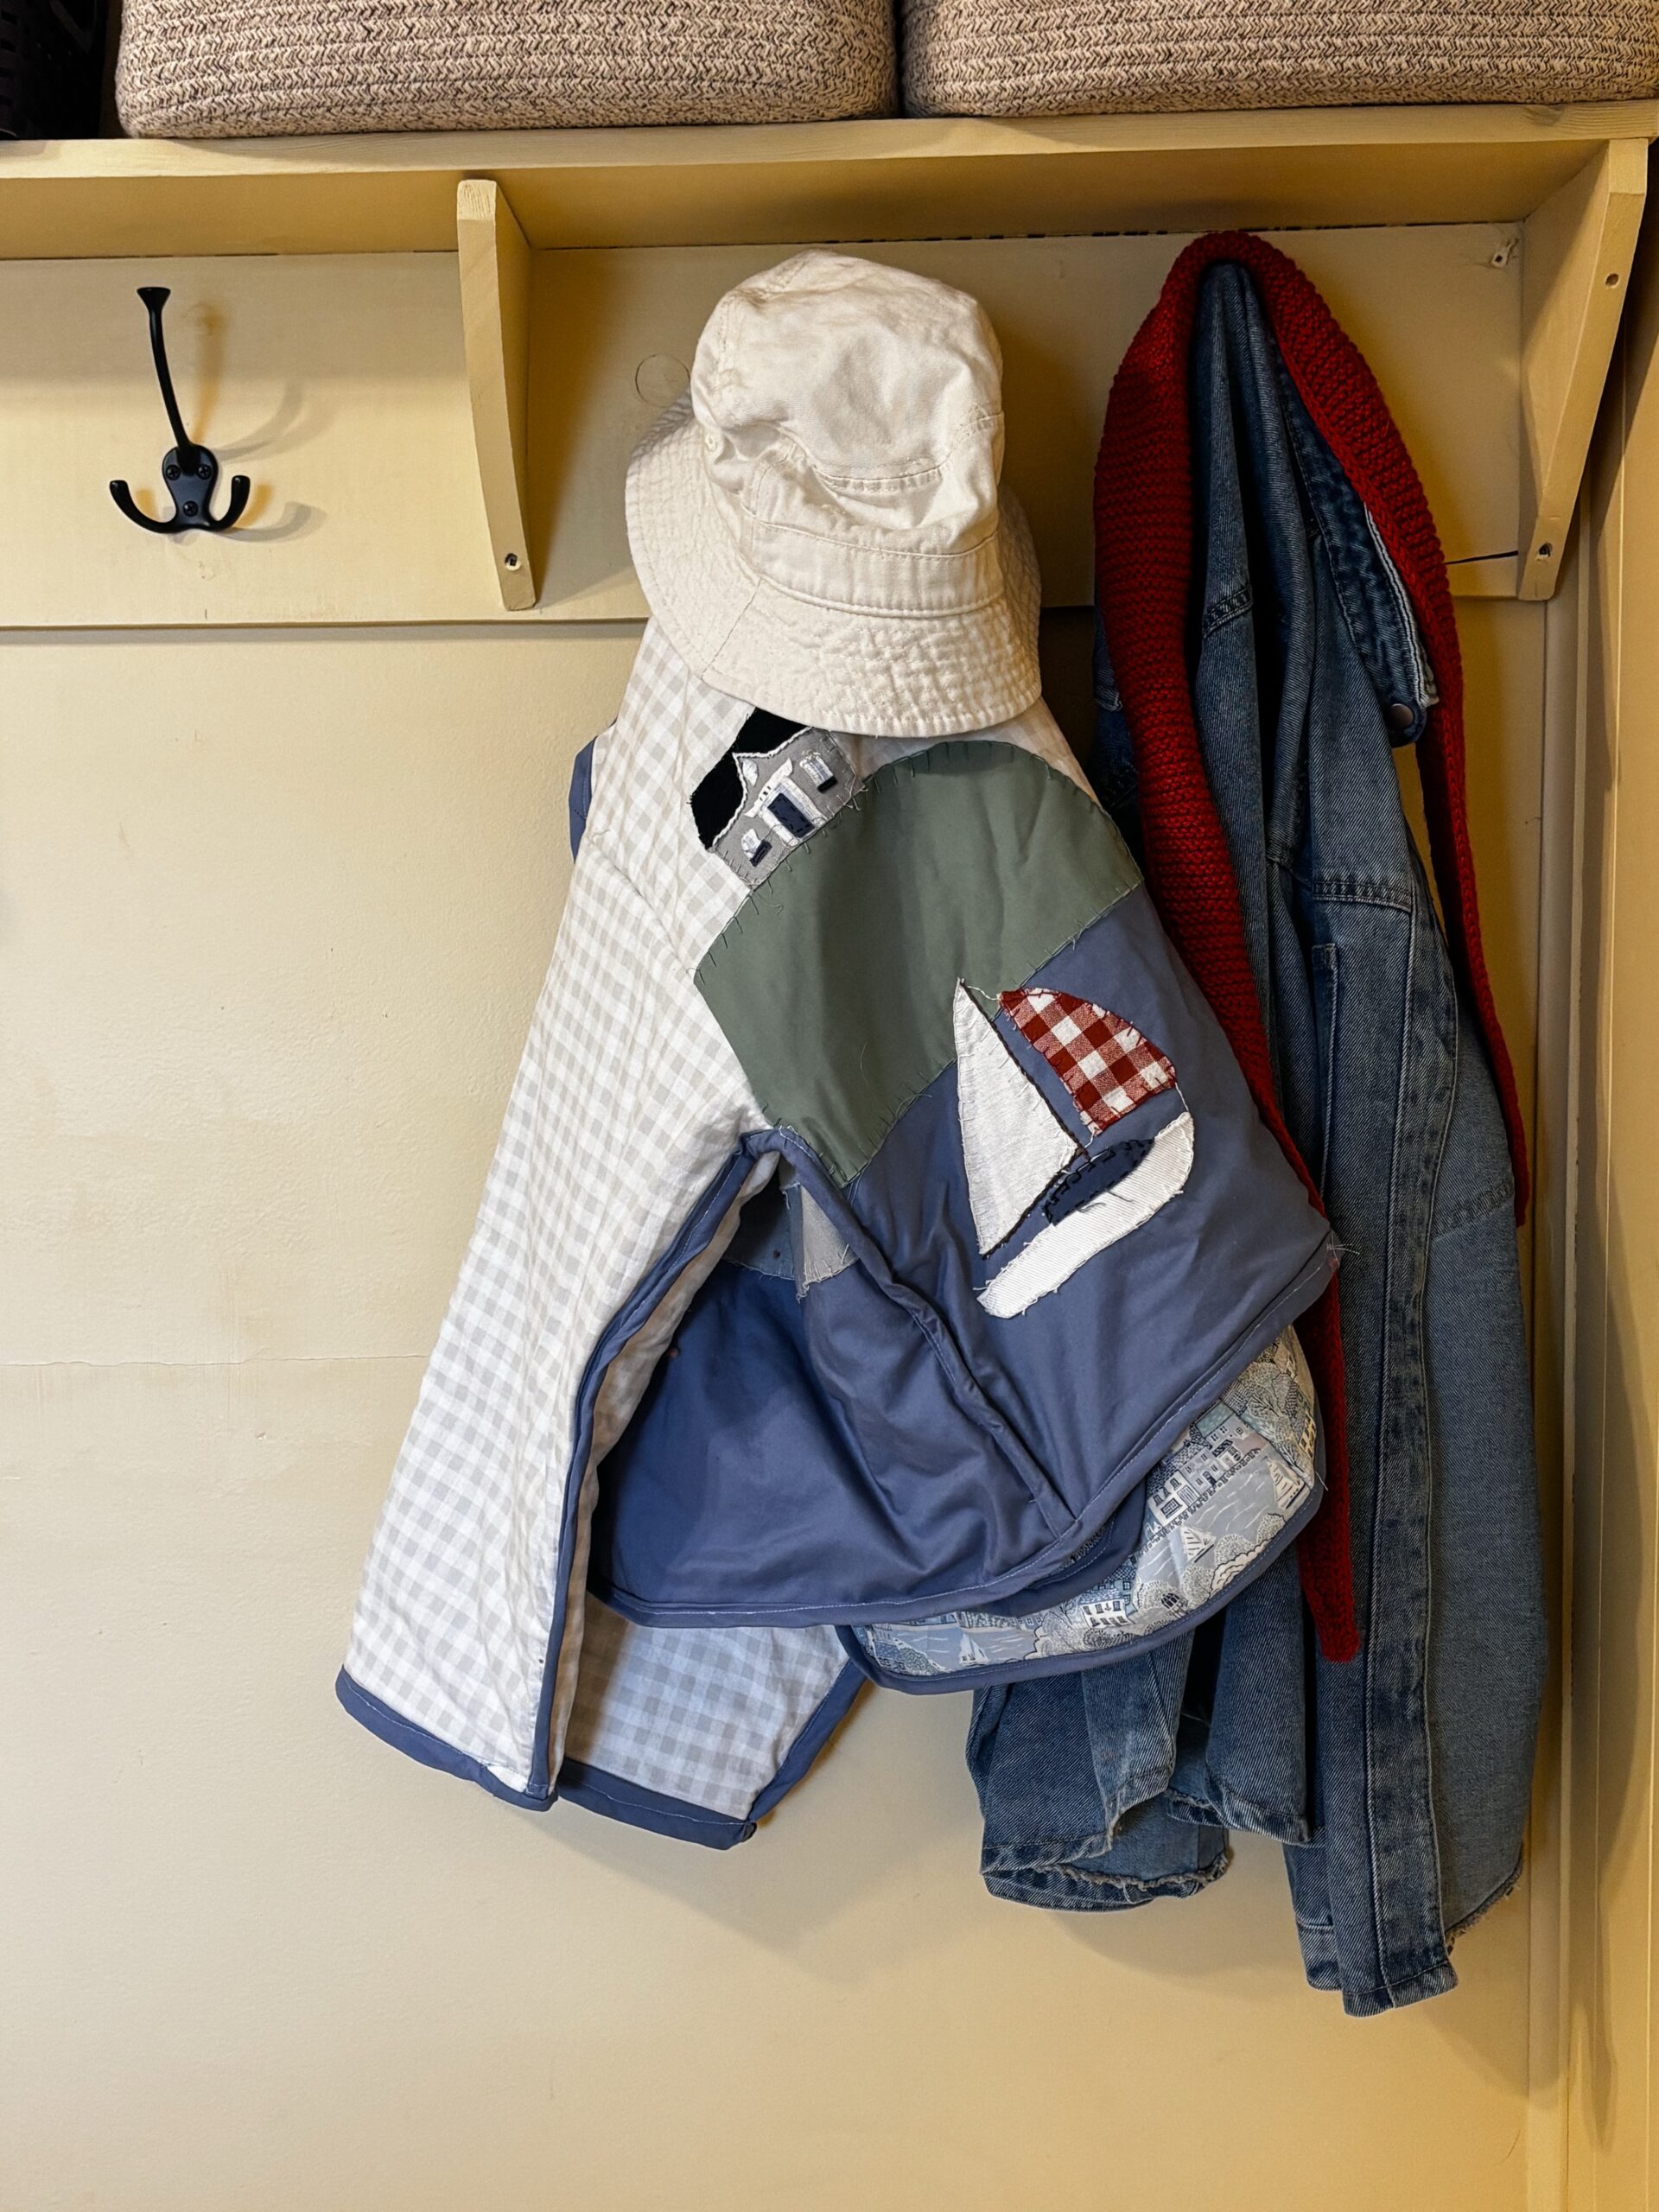
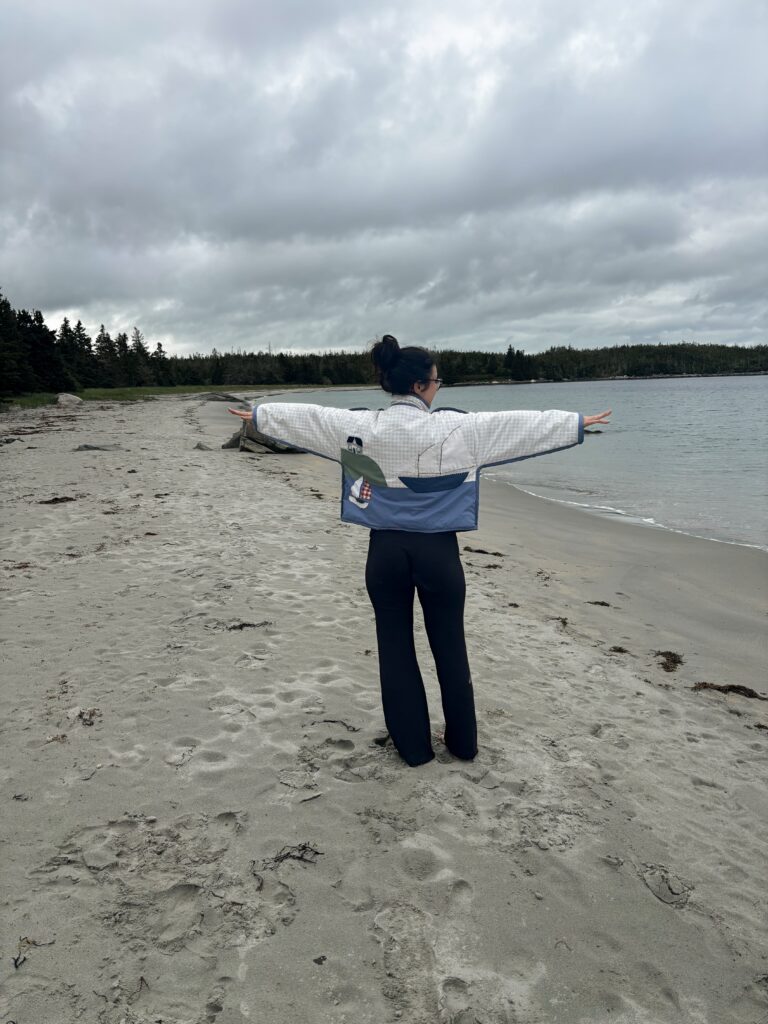
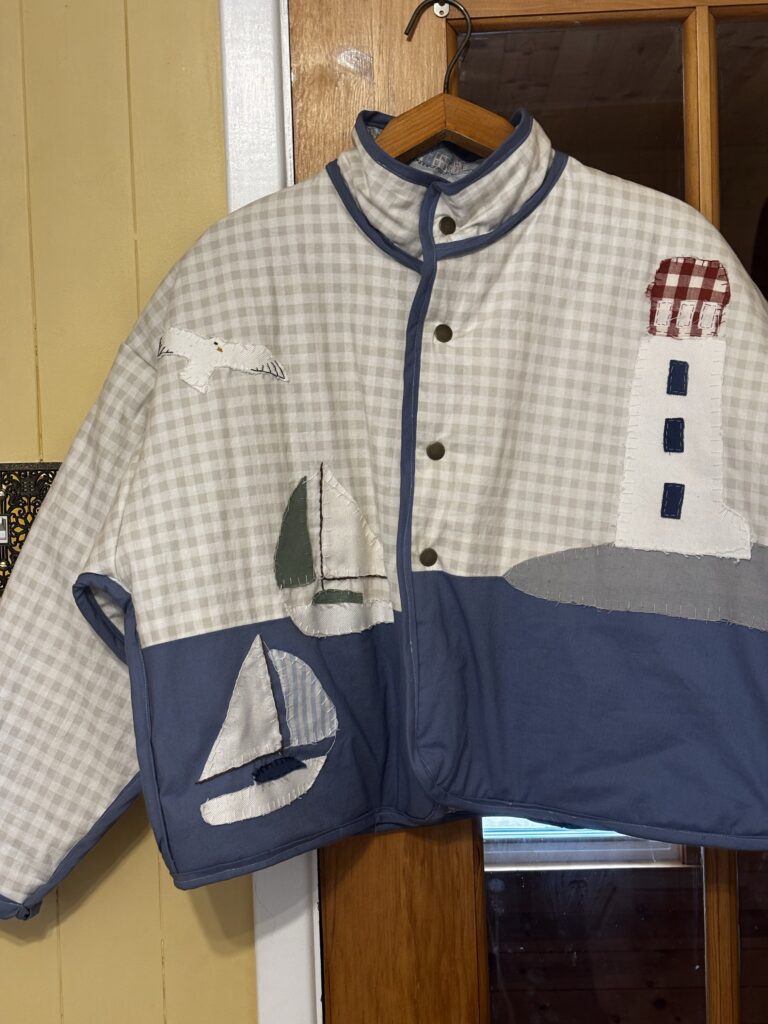
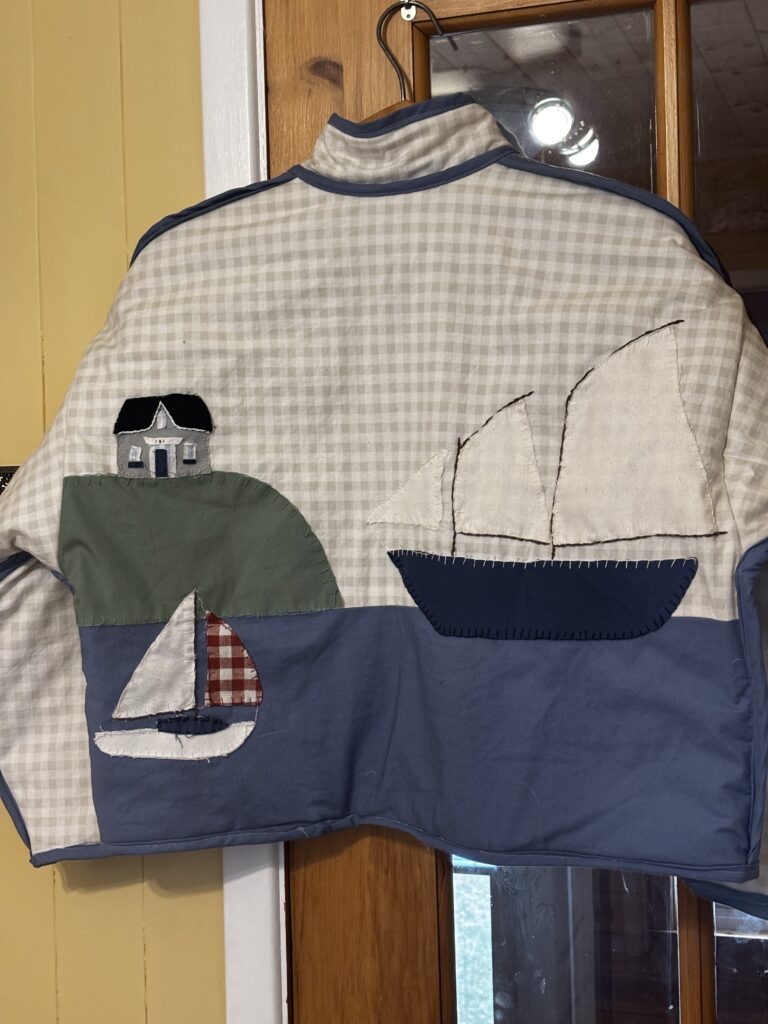
That’s exactly what I did when I made my very own quilt jacket. While my quilt jacket isn’t technically a quilt, I still made the entire jacket & sewed on the applique by hand to create an adorable, fun coastal quilt jacket.
The quilt jacket is a reversible quilt jacket, which I will not be showing how you make BUT I will share the pattern and my personal review of the pattern and whether I think you should purchase it.
With a lot of hard work & time, I was able to make the jacket within a month. Having kids can make the process of making things slightly slower.
How I Sewed My Applique Coastal Quilt Jacket
Before we get into the nitty-gritty, I want to share the why.
I had come across different coastal-style quilt jackets on Pinterest, and I fell in love. However, I wanted to figure out a way I could combine these jackets and turn them into my dream jacket.
And that’s exactly what I did.
Reversible Quilt Jacket Sewing Pattern
The first thing I did was I had to find a sewing pattern & I wanted a pattern in particular that was reversible.
That’s when I discovered the Cardamom Quilt Jacket by Sew Bake Makes. It was exactly what I was looking for. Different lengths, collars, pockets, and the best part? It’s a reversible pattern.
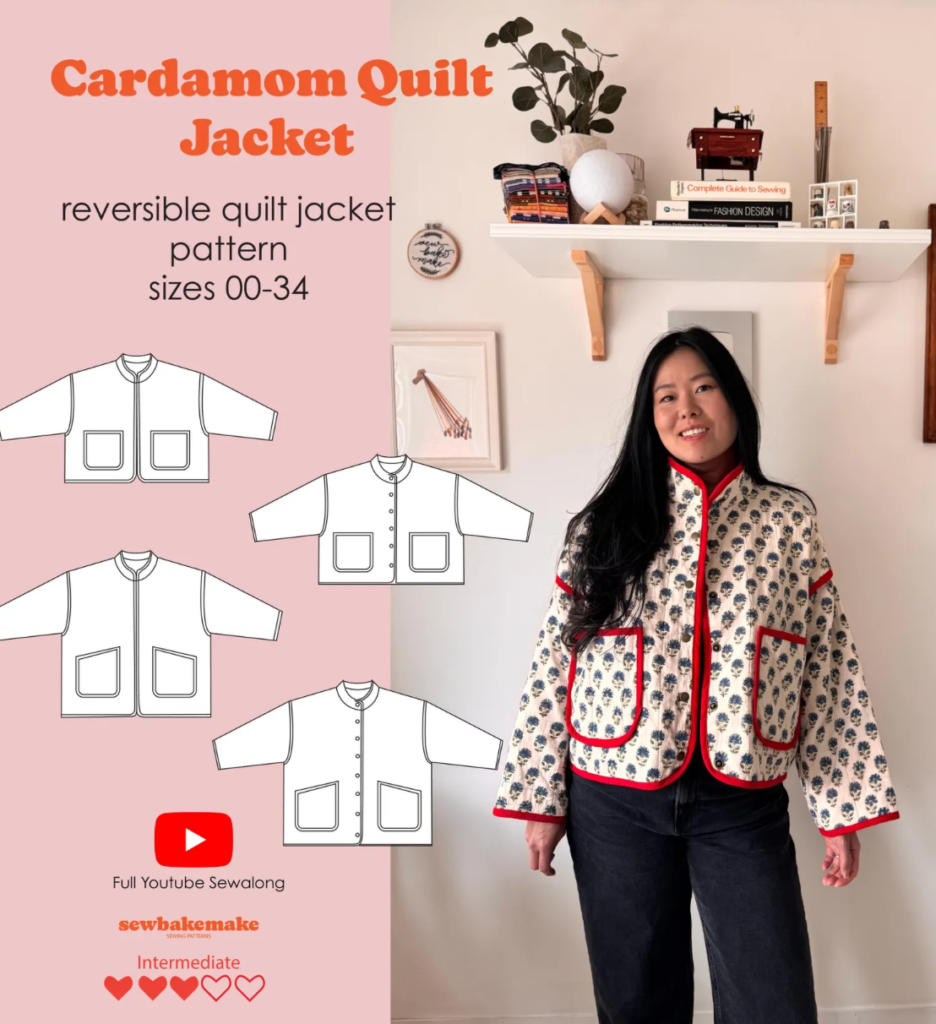
Now, would I recommend this pattern?
Absolutely.
The sewing pattern is detailed great for all levels of sewing & she has a YouTube video that you can watch while sewing.
It’s a great sewing pattern to practice your bias tape. Since the jacket is reversible, a lot of the jacket uses bias tape in its construction.
How I designed my appliqué quilt jacket
Once I figured out a pattern, printed off the pattern, and had an idea of what the dimensions of the jacket was going to be, I started to sketch out different designs.
I wanted one side of my jacket to be “quilted”, but the other side, the appliqué side, not to be. I cut out the main fabric and batting and quilted those 2 together. The pattern instructs to quilt the main and lining together, however I did not do that.
For the appliqué side, I laid out the fabric for the sky and cut it out, however, I did not cut out the entire pattern piece. Measuring down about 3 inches, I then cut off. The remainder of the pattern piece, I would cut in the blue fabric for the ocean.
I then sewed the pieces together for the back and front panel pieces and started the process of designing my appliqué.
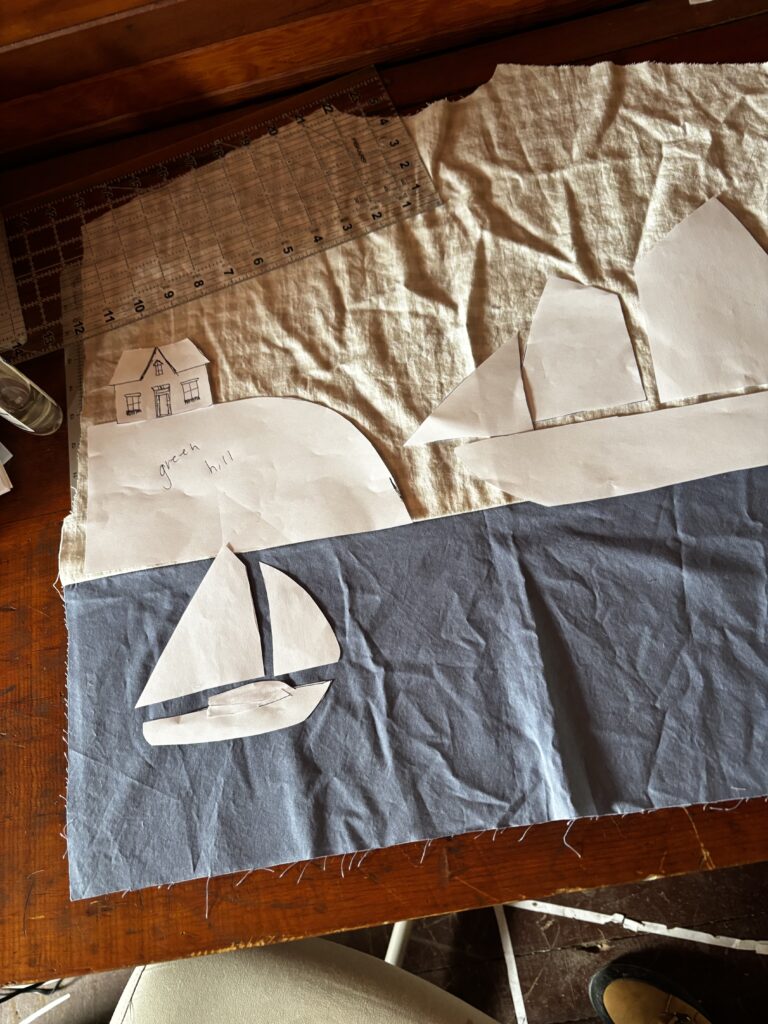
After drawing multiple sketches, I came up with a landscape of drawings. Laying them out on the fabric, I designed how my jacket would turn out.
Instead of purchasing new fabric for the appliqué pieces, I used up scrap fabric. Now the project was turning into a scrap buster sewing project, perfect!
To sew the pieces onto my jacket, I decided to hand-sew them on instead of using my machine.
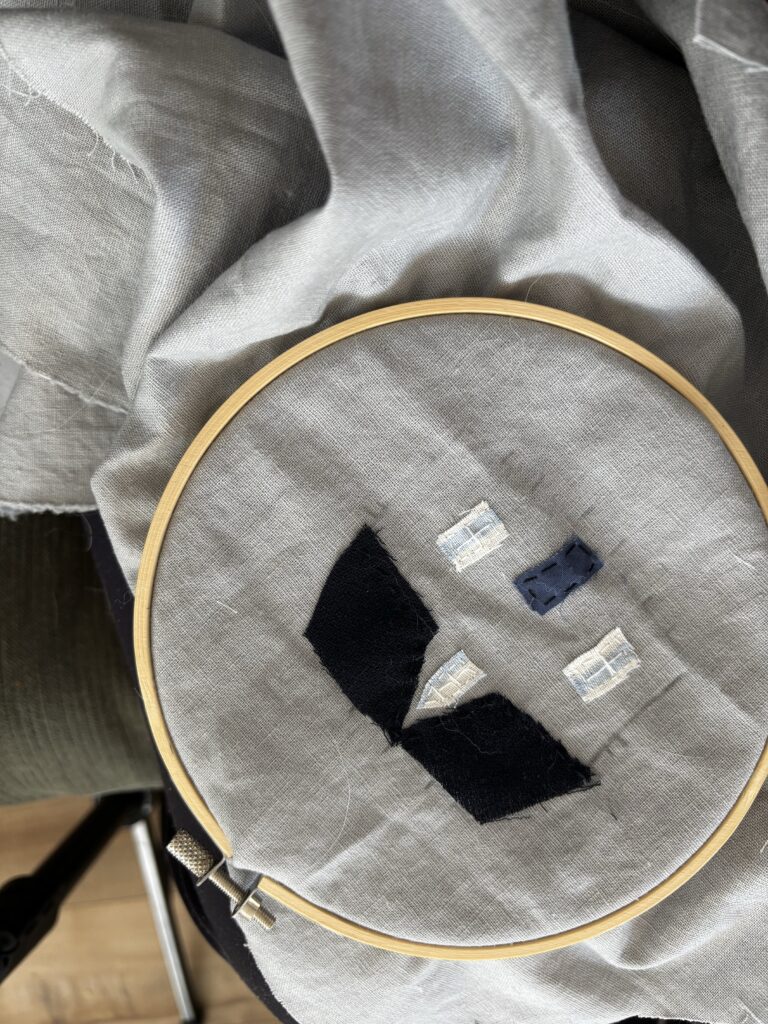
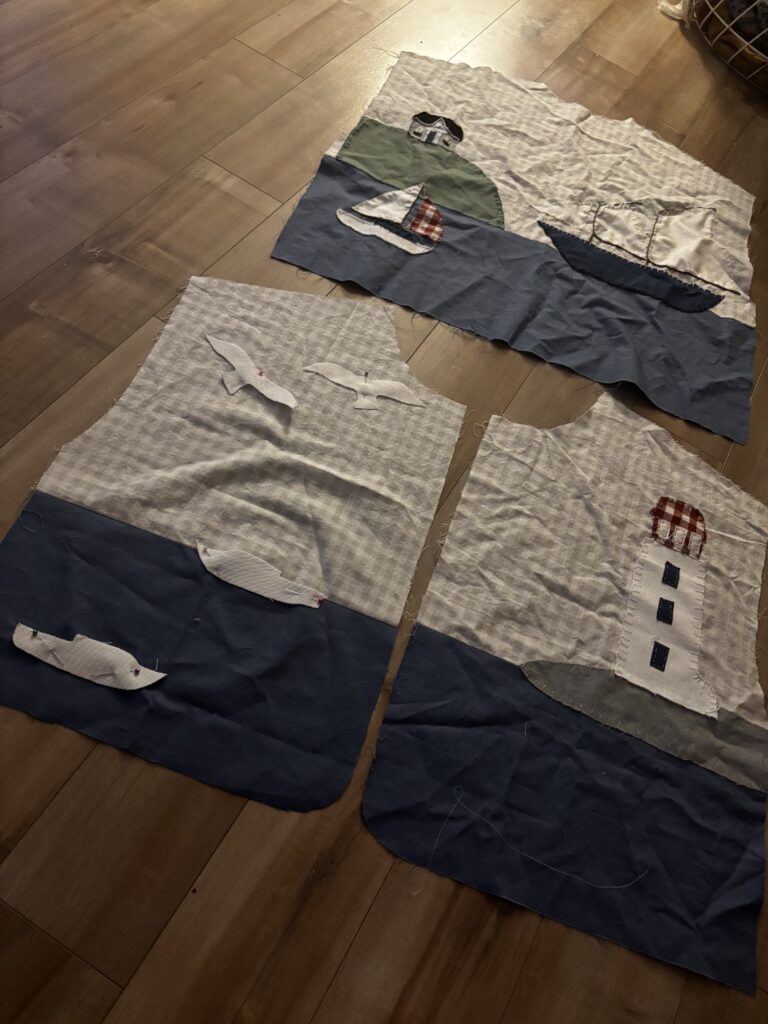
Once all the appliqué was sewn on, I took an extra step and sewed the main fabric and appliqué pieces together with a zig zag stitch. I knew that sewing the jacket together with bias tape would be more difficult if the jacket wasn’t attached.
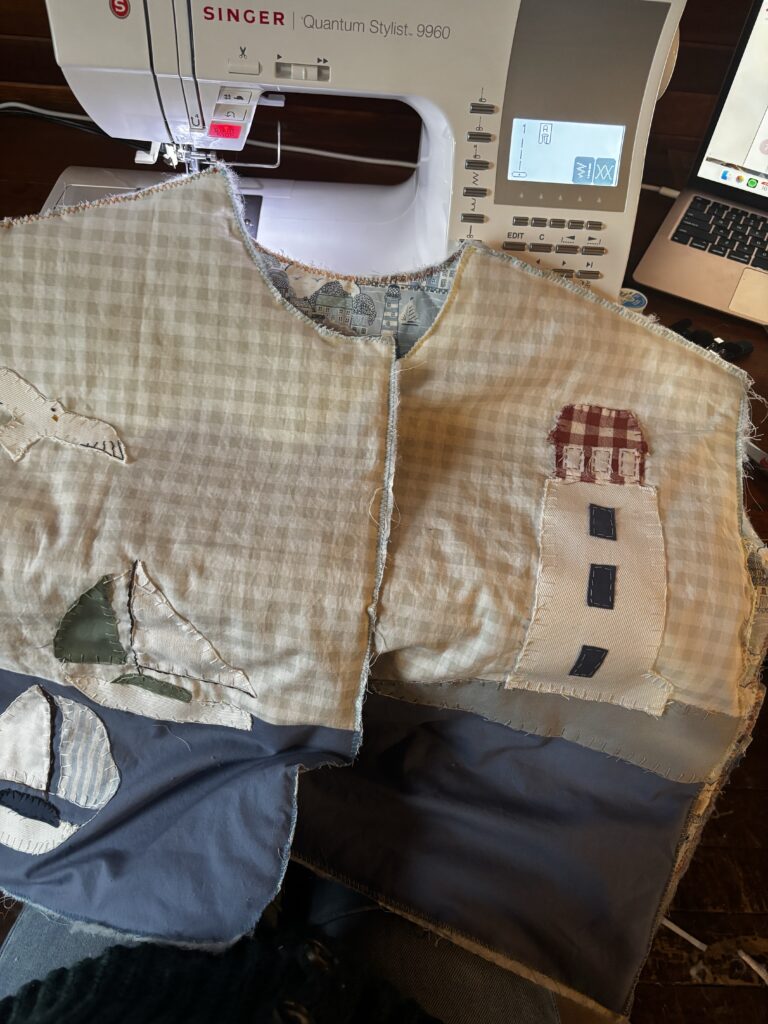
Following the pattern, I finished the rest and voila, a quilt jacket with an extra flair.
Letting my creativity take hold on was the best route for this project and I so pleased with how everything turned out.
Applique Pattern Pieces
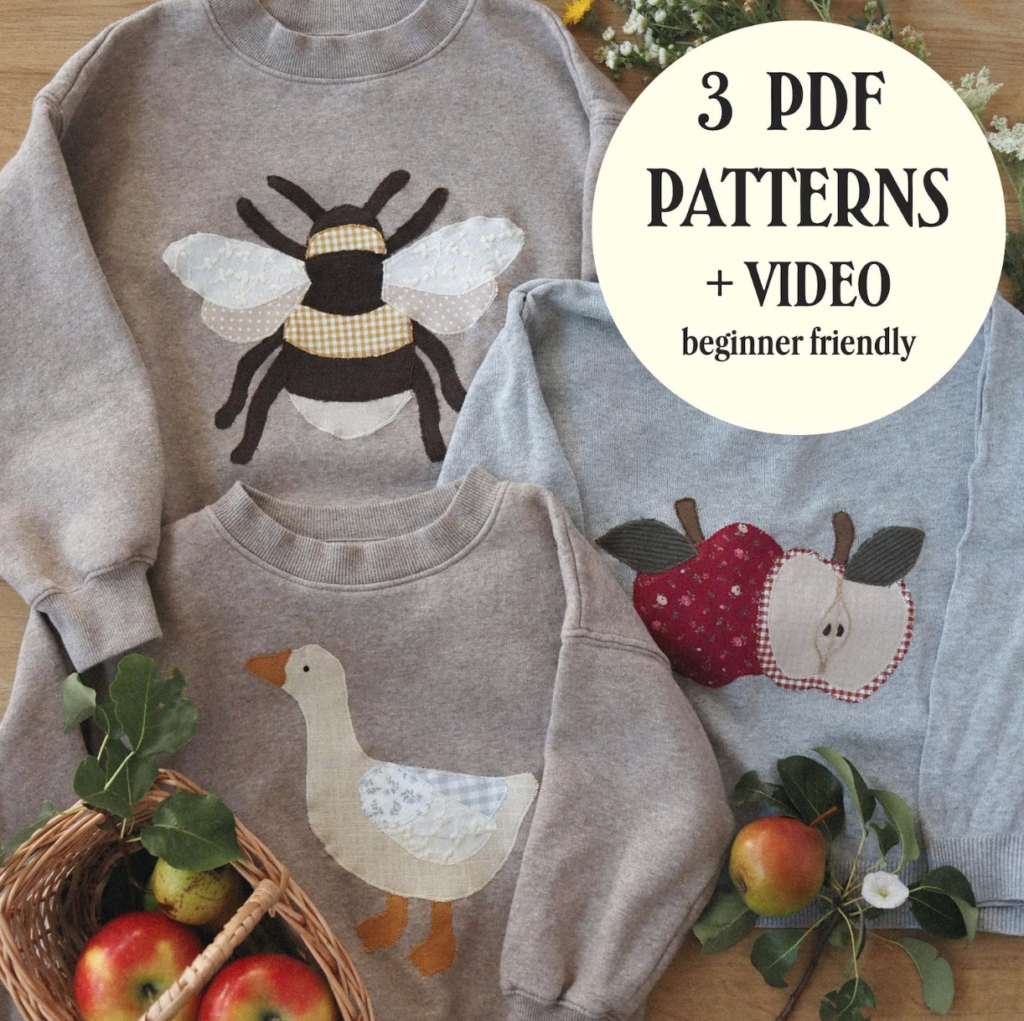
If you’re interested in creating an appliqué quilt jacket but aren’t confident in drawing, that okay! There are artists who sell appliqué pattern pieces.
One in particular that has caught my eye is MelMadeMarket on etsy.
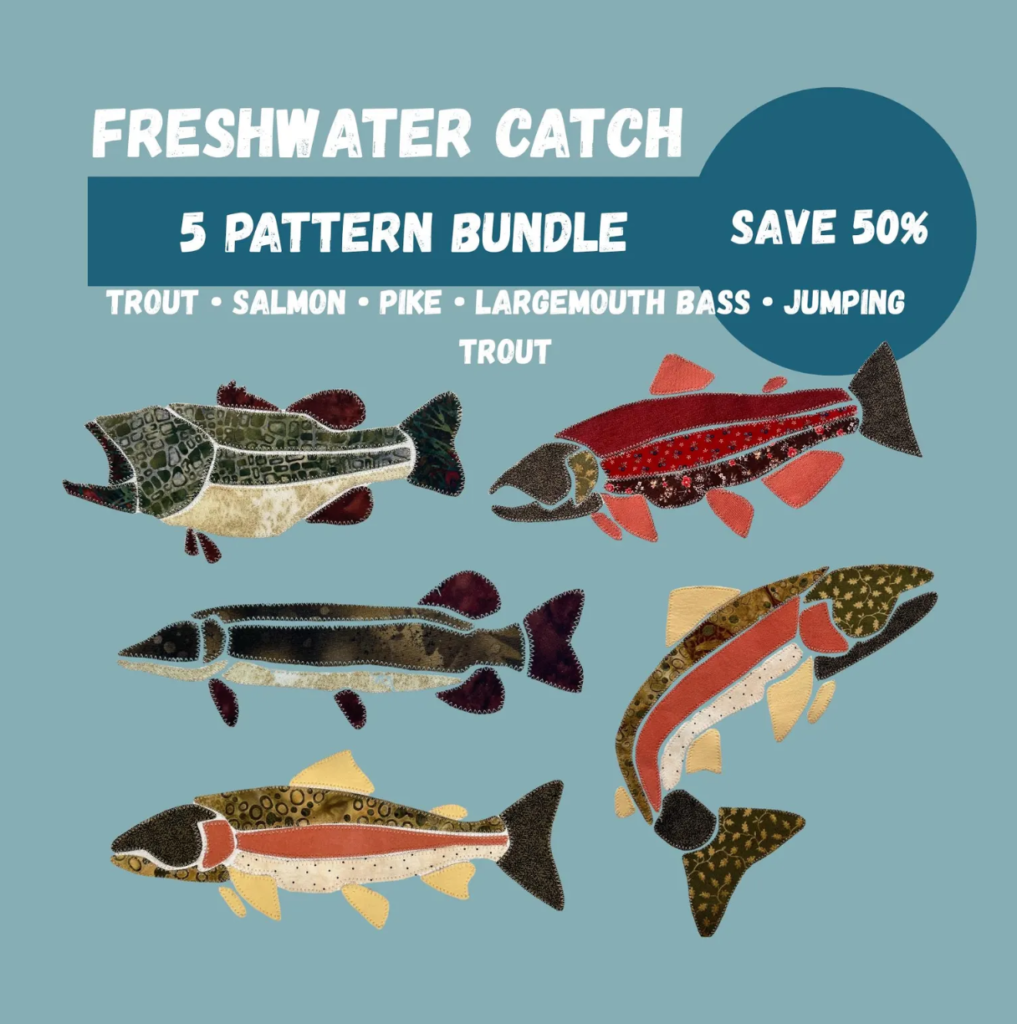
She has so many other beautiful designs available for purchase.
Another great artist is HumblebeeAtelier also available on Etsy. While her selection is very limited, she still has beautiful designs. Look at those apples, how cute!
Happy Sewing!