Knitting for Beginners: How to M1L & M1R Stitch
When you’re knitting an item, sometimes you need to add stitches onto your needles. There are plenty of different ways to increase your stitch count, but the most common is the M1 knit stitch.
Sometimes, M1 can be a little complicated, especially for a beginner. I’ve broken down each step with description, pictures, AND video so you can easily grasp this helpful stitch.
Related blog posts: How to cast on, How to knit, How to bind off
The M1 Stitch
Before we get into the lesson on how to knit this stitch, we first need to do a small discussion about this knit stitch. This knit stitch, the M1 stitch is an acronym for Make one.
When doing a M1, there are two different variations: M1L or make one left and M1R or make one right.
Each of these variations lean in a different direction. The left make one stitch will lean towards the left and the right make one stitch will lean towards the right.
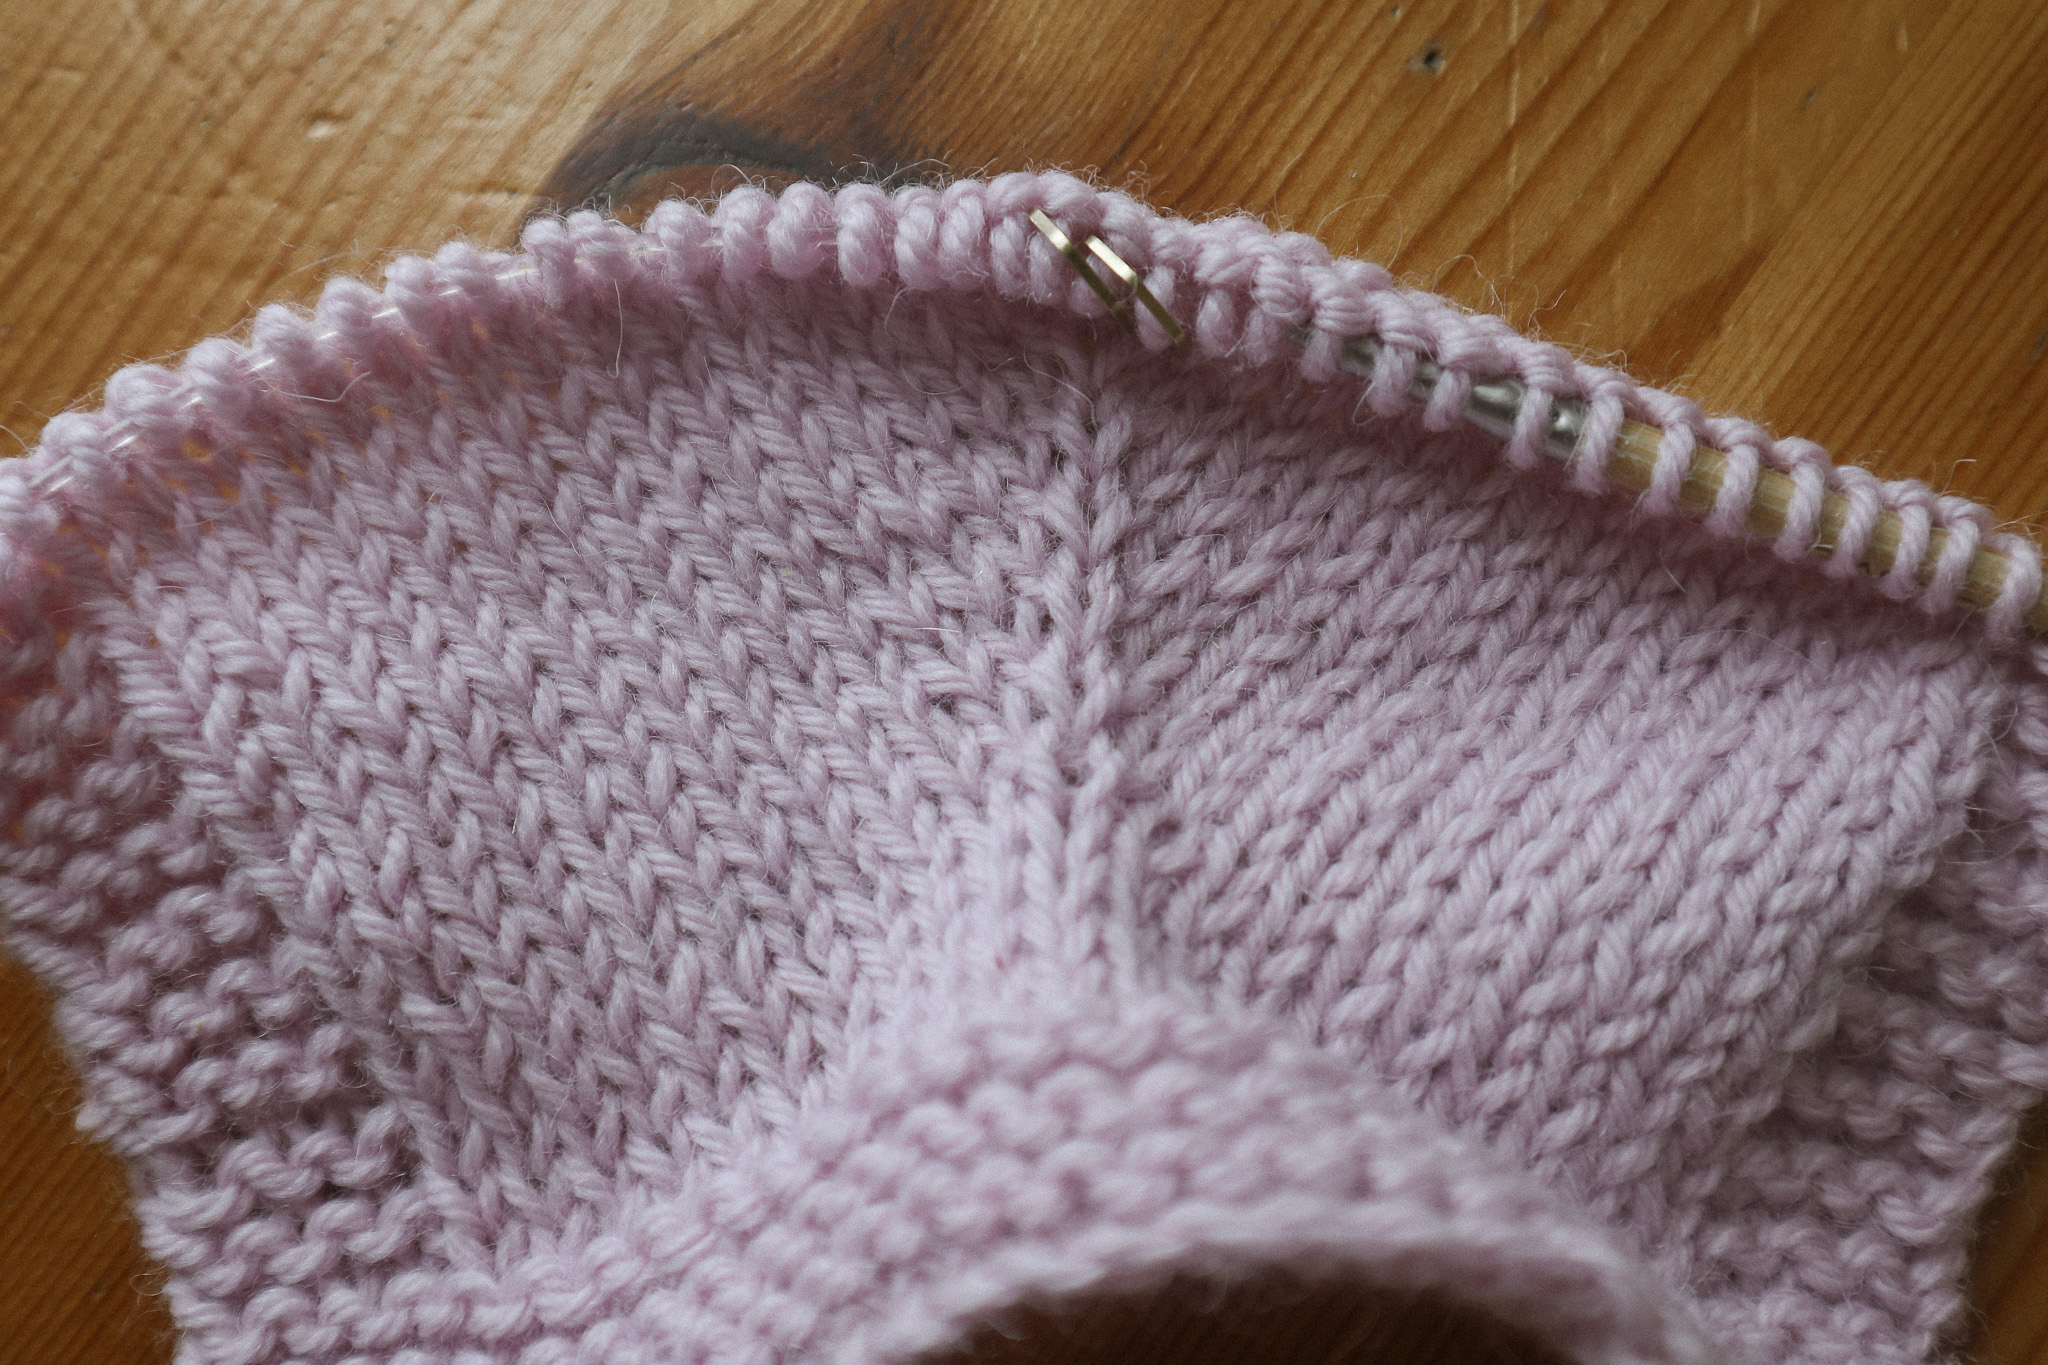
Just take a peak at the photo below. Notice how there are stitches leaning more to the right & stitches leaning more the left? Those are our increases.

When we increase our work, we add stitches to the knitting needle. I mean this sounds pretty obvious, but how exactly can we get more stitches onto the needles?
For the M1 stitches, we are increasing from the stitches below.
Pull your needles gently apart, and you’ll see yarn that attaches between both of the previous stitches. That’s what we are going to use to increase our stitches, it’s just a matter of how we do it will depend on the look of the increase stitch.
Most patterns will have you place stitch markers so you know when to increase your stitches. This tutorial, I am using markers to easily show where and how to increase.
Where you’d use it
Knitting patterns where you are adding a shape to it is often where these stitches are used.
For example, knitting sleeves (if you’re knitting from the bottom to top) is a great example of where you’d find these increases.
How to Knit the M1 Stitch: M1R
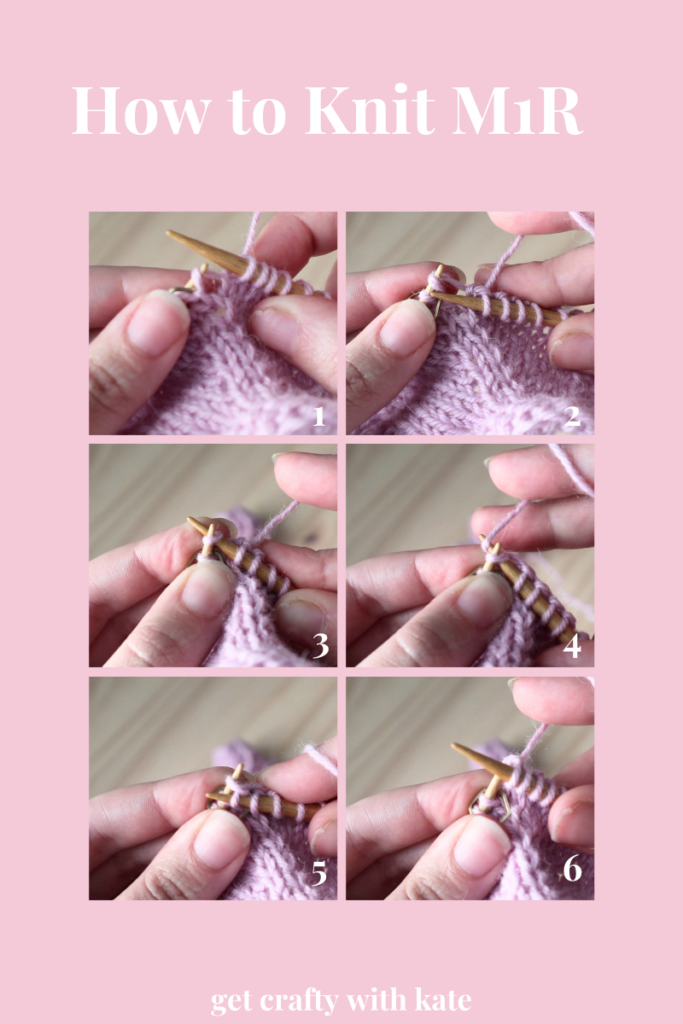
- With the left needle, pick up the yarn from between the stitches from back to front. Meaning, taking your knitting needle, insert it through the yarn from behind and push through so the needle to pushing through the front.
- Pull up so that the yarn is now on your needle. Taking the needle in your right hand, bring it to the front of the left needle.
- Now we are going to knit through the front loop. Taking your knitting needle in your right hand, push the needle through the yarn that is looped onto your needle from the front. The needle should be going through the front part of the yarn and the tip of the needle should be facing back. If it feels tight, then you’re doing it right!
- Grabbing our working yarn, wrap it around our working needle.
- Now, knit the stitch. It’ll feel tight and might be difficult to do. That’s okay, it’s going feel a little tight.
- And like you’d knit normally, slip it off the needle and ta-da, you did an increase that leans to the right.
How to Knit the M1 Stitch: M1L

- With the left needle in our hand, we are going to grab the yarn from between the stitches from front to back., Meaning, take your needle to the front of the work and insert the needle between the yarn so that the needle looks like its going through your work, with the needle coming out the back.
- Pull up on the so that the yarn is pulled up onto your knitting needle.
- Now we are going to knit through the back loop. Taking your knitting needle to the back of the work, insert it through the back of the yarn.
- Taking your working yarn, wrap it around your knitting needle.
- Knit the stitch. It might be a little difficult to do, but if it’s tight, that means you’re doing it right.
- As you do when you knit, slip it off your knitting needle and ta-da, you did an increase that leads to the left
Happy knitting, Kate